


These adorable treats are perfect for parties, gatherings, or simply to bring a smile to your day. With a fun and engaging approach, we’ll guide you through creating these charming little mice, bite by delightful bite. Let’s dive into the magical world of baking where whimsy meets flavor.
Ingredients You’ll Need:
- 12 cozy paper cupcake liners nestled in a 12-hole cupcake tin or quaint individual tartlet molds for that personal touch.
- For the Cupcakes:
- 2 heaping tbsp. of unsweetened cocoa powder to bring the chocolatey goodness.
- 1 cup of self-raising flour, the foundation of any great cupcake.
- 1/2 cup of golden caster sugar, for that sweet sparkle.
- 4 ounces of soft butter (that’s 1 stick), to make everything nice and moist.
- 2 free-range eggs, the secret to a fluffy texture.
- 1 tsp. of pure vanilla extract, because every great recipe has a dash of vanilla.
- For the Glaze:
- 5 ounces of milk chocolate (or 1 cup of chocolate drops) for a glossy finish.
- 6 tbsp. of butter, to make the glaze irresistibly silky.
- For the Decoration:
- 12 marshmallows, the cute little mouse heads.
- Chocolate buttons or flaked almonds for the ears – creativity is key!
- Thin strips of flaked almonds for the whiskers, to add a touch of whimsy.
- Miniature marshmallows for the eyes and noses, bringing your mice to life.
- Tiny chocolate stars, Smarties, or M&M’s for that extra sparkle.
Baking These Beauties: A Step-by-Step Guide
- Warm-Up Your Kitchen: Preheat your oven to a cozy 375 degrees Fahrenheit. This warm embrace will welcome your cupcakes to perfection.
- Prepare Your Cupcake Tin: Line your tin with the paper liners, setting the stage for your cupcake masterpieces.
- Mix It Up – The Cupcake Batter: Sift the cocoa and flour into a bowl as if you’re sprinkling a little magic. Add in the sugar, butter, eggs, and vanilla extract. Mix by hand or with an electric mixer until you’ve got a smooth, enchanting batter.
- Fill and Bake: Spoon the batter into the liners, filling them halfway. Remember to create a little well in the center for a perfectly flat top. Bake for 12-15 minutes or until they bounce back to a gentle touch. Let them cool, as anticipation builds.
- Glossy Chocolate Glaze: Melt the chocolate and whisk in the butter until you’ve got a glaze so glossy, it mirrors your excitement. Adjust the chocolate as needed for the perfect consistency.
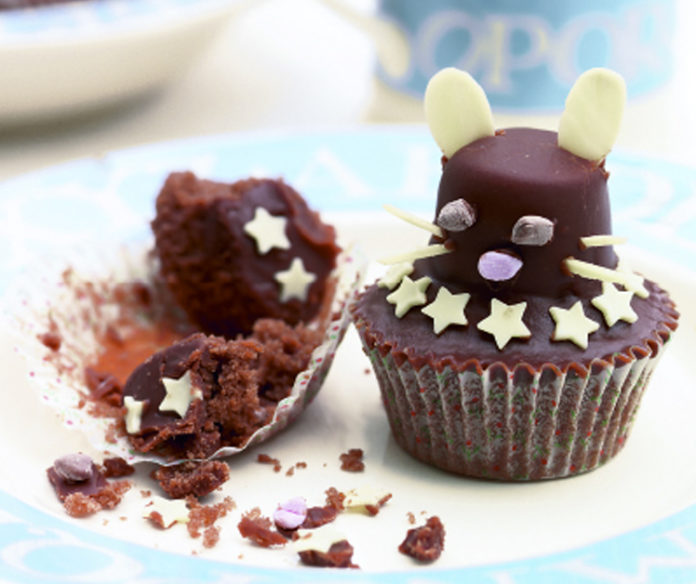
- Assemble Your Mice: If your cupcakes have risen, trim them down to create a flat canvas. Dab a bit of glaze on each cupcake and gently press a marshmallow on top for the head. Coat with the chocolate glaze, ensuring a seamless chocolate cloak.
- Bring Your Mice to Life: Before the glaze sets, adorn each mouse with marshmallow eyes and nose, ears, and almond whiskers. Add a dash of personality with little stars, Smarties, or M&M’s.
Storing Your Creations: Keep your delightful mouse cupcakes in an airtight container, and they’ll be fresh for up to three days—perfect for extending the joy.
There you have it, a recipe not just for cupcakes, but for joy, smiles, and a dash of whimsy. These Mouse Cupcakes are sure to be a hit, inviting everyone to indulge in their playful side. Happy baking!


