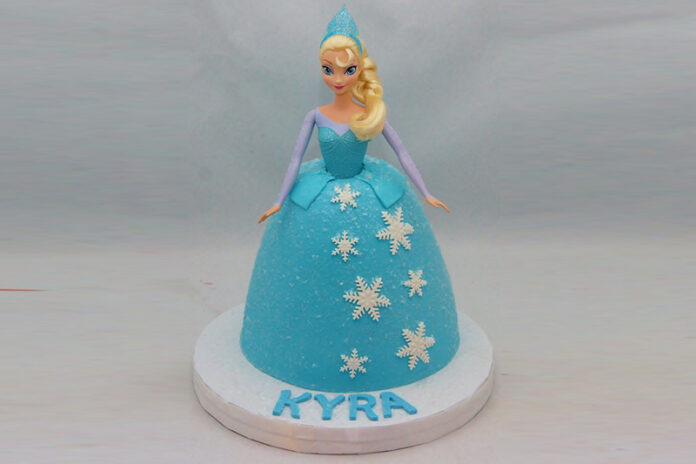
Creating a Frozen-themed princess cake is like bringing a touch of winter magic into your kitchen. Imagine the delight on your child’s face when they see their favorite Frozen character come to life in cake form, complete with shimmering snowflakes and icy blue frosting. Whether you’re a seasoned baker or just looking to try something new, this cake is the perfect project to channel your inner pastry artist. With a little creativity and some basic baking tools, you can craft a show-stopping centerpiece that will make any Frozen fan’s special day unforgettable. Ready to create some edible magic? Let’s get started!
2-3 layers of your favorite cake (vanilla, chocolate, or a flavor of choice)
Buttercream or frosting (white and blue)
Fondant (white, light blue, and dark blue)
Edible glitter or sprinkles (optional)
Cake board
Offset spatula
Rolling pin (for fondant)
Piping bags and tips
Small knife or fondant tools
Plastic or doll cake topper resembling a Frozen princess (like Elsa or Anna)
1. Bake and Prepare the Cake Layers:
Bake 2-3 round cake layers according to your recipe or box instructions. Let them cool completely.
Level the cakes with a knife so they stack evenly.
Place one cake layer on the cake board. Add a layer of frosting between each cake layer.
Stack the layers on top of each other, ensuring they are centered.
If using a doll topper, carve the cake into a dome shape to mimic the skirt. Ensure the cake is tall enough to accommodate the doll’s legs.
Apply a thin layer of buttercream over the entire cake to seal in crumbs. Chill the cake for about 30 minutes.
Roll out the light blue fondant and drape it over the cake, smoothing it out with your hands. Trim any excess fondant.
Use darker blue fondant to create patterns like snowflakes, ice crystals, or borders. Attach these using a bit of water or edible glue.
Use white buttercream to pipe additional designs, like swirls, snowflakes, or ruffles. You can add edible glitter for an icy effect.
If using a doll topper, carefully insert it into the center of the cake. Decorate around the doll to blend the dress into the cake.
Add final details like more snowflakes, glitter, or any other decorations to match the Frozen theme.
Color Scheme: Stick to cool tones like white, light blue, and silver for an authentic Frozen look.
Make Ahead: Fondant decorations can be made ahead of time to save on the day of assembly.
With a bit of creativity and patience, your Frozen-themed princess cake will be a magical centerpiece for any celebration!


